In 2003 I bought a Gavin from Greg Mossfeldt. On the very first dive (Dec 26) I managed to trash my knee on the ice at Minnewanka but carried on with the dive as I was already wet and cold is good for injuries. The knee healed with the help of physio, and I continued to dive the Gavin for some time, even taking a scooter course from GUE at one point. We scootered frequently to the 1895 dam in Minnewanka and had a lot of fun.
In the summer of 2005 I sold the Gavin and bought one of the first DiveXtras scooters - the Echo. It was half the weight of a Gavin and the same run time. I enjoyed diving that scooter and brought it with me to Vancouver Island. Unfortunatley I was the only scooter owner at the time, and between that and eel grass I decided to sell the scooter in 2007.
Now it's 2016. In the interim I borrowed a DiveXtras CUDA 650 for a run between the Cape Breton and the Saskatchewan, and had a blast. I decided it was time for another scooter as my dive buddy has a Gavin and wanted to start diving it on some of our local sites.
One site in particular, the Chemainus dry docks, is really suitable for scootering as there is a 16min swim at the start and end, and 130ft between docks 1 and 2. In addition, the dry docks are just large enough that swimming all four takes some time and it's difficult to cover everything on a single dive.
The short list included a used CUDA 650 and a new Piranna 1, both from DiveXtras. In the end I decided to get the P1 as there was a demo unit for sale from the local dealer and it was really suited to my diving plans.
Here's a photo of the P1 ready to leave home for a dive. This thing is small, light, and a blast to use underwater. If you look at my dive logs since Sept 2016, you will see some videos made on the P1 and some of me driving the P1.

I was teaching a drysuit course last week, so reinstalled the exhaust valve in the 2003 DUI TLS350 drysuit as I wanted to try that suit again. The same day I also installed a replacement pee-valve check valve. I did not notice any problems with either installation.
However, on the drysuit course I discovered the exhaust valve would not auto-exhaust, and even pushing the valve manually gave rather slow exhaust. The course went well as I simply ran the suit 'lean' and used by wing for buoyancy.
However, once on land a quick examination showed the valve was not rotating to the open position fully. Rather than about 1 1/2 full turns, it was only running 1/2 turn. The next day I removed the exhaust valve and discovered... you must turn the valve to fully closed before inserting it into the valve body and tightening the small screws. If you simply insert the valve and screw it into place without first checking for closure, the amount of rotation will be restricted and you won't get the valve turned to the full auto position. In addition, the incorrect placement results in the valve not completely opening when you depress the center. Once I figured this out it was a very quick process to close the valve, insert and screw it into place. A quick test confirmed full rotation.
As an aside: The Pee-Valve check valves in the old style (hole with a bolt) pee valves can be removed. It turns out they are a simple mechanism of nylon and o-rings. Over time the o-rings get dirty and the whole thing can be removed, easily taken apart (it is user-serviceable as it turns out), cleaned with vinegar and then reassembled. As a result the new valve is in my suit and I have a fully working (cleaned) spare.
The past two dives have not been fun, because my drysuit exhaust valve started leaking badly the entire dive. Exiting the wather after an 80-100 minute dive with a soaking wet left arm and glove is just not fun. It was time for some drysuit exhaust valve maintenance.
I've searched far and wide, but can only find teardowns for the newer low-profile valve. The valve on my drysuit is the Apex high profile design. The only information I can find on the web discusses why the valve was popular several years ago, but that was all.
Rinsing and other minor external maintenance did not fix the problem, so it was time for more drastic measures, which meant removal. Before removing the valve, I called DUI (the makers of my TLS350, purchased in 2009) and talked to them about the valve. They were able to give me some removal & installation tips, but could not really comment on this older style valve.
Thus armed, yesterday I removed the valve from the suit, then took it apart. After removing the back cover (a.k.a. underwear shield), the nut and rubber washer were revealed. It was not too difficult to remove the nut, even though it was pretty much siliconed in place. Once removed, I washed the valve components and then started disassembly.
It's really a fairly simple design, except there seems to be two diaphrams in the valve rather than just one. The inner (main) diaphrahm is a typical mushroom valve, and on mine it's in excellent shape and does not appear to be the cause of the leaking. The mushroom valve is contained in a plastic 'cup' that fits inside the threaded open/close mechanism.
Surrounding the mushroom valve cup is a very thin rubber ring (green on my valve) that sits between the cup and the adjustment ring. A cap fits inside the cup, both to protect the mushroom valve and to provide a place to seat a small spring against the outer rotating valve cover.
It appears the purpose of this rubber ring/cap/spring is to put some pressure on the cap and rubber ring, creating a seal with the adjustment ring. I'm guessing this is a secondary gas vent system (the primary being the mushroom valve). Inspecting the sealing surface on the adjustment ring I found small deposits that are probably the cause of the leak. I cleaned it off and reassembled the valve and it now seals against the maximum suction I can create by inhaling on the valve from the inside.
The whole mechanism is held to the valve body with 3 screws, accessed from inside the suit (when the valve is installed) after the inner shield is removed. So it is possible to totally disassemble the valve while still on the suit - something that would have been nice to know as the valve was silicone sealed on the suit by DUI. At least future disassembly will be easier in the future knowing this.
Click on any of these larger thumbnails to display a full-size image


Here are some more pictures showing how the valve can be removed from a drysuit without unscrewing the valve from the suit and thus not damaging the silicone seal as installed from the factory. The inner cap is still removed, exposing the large fastening nut as well as the three inner screws. Instead of unscrewing the whole valve, the valve is depressed (i.e. push the valve against a rug on the floor) and then the three screws carefully removed. Don't allow the valve to 'spring back' until all the screws are removed to prevent stripping them. Once removed, the inner body just comes out into your hand.
The remainder of the pictures show the inner components of the exhaust valve as described in the paragraphs above. You can clearly see the thin green rubber ring, the small spring and cap, and larger threaded body that is turned to adjust the exhaust valve from 'auto' to closed. It is careful cleaning of the sealing face between this component and the green rubber ring that seems to have fixed the problem - pending in-water testing.
Click on any of these larger thumbnails to display a full-size image


Update, 2014-01-13
Yesterday I dove the repaired suit for the first time. The good news is that the valve no longer leaks. After some consideration of the repair, I am of the opinion that the valve 'workings' were never the problem. I now thing the valve-to-suit seal had weakened and was leaking. I think this for two reasons: first, when removing the valve from the suit, it was much easier to turn the big nut than with any other valve I've worked on - whether the inflate valve, or the exhaust valve on my CF200. They were almost impossible to unscrew at the beginning, and only much force eventually loosened them. In contrast, this valve started turning almost immediately and came undone quite quickly and easily. Secondly, the silicone started peeling and falling off into my hands as soon as the valve started to turn. By the time I had the valve loose, there was almost no trace of the silicone sealing faces left on the suit; it was all bits in my hands. When I removed the inflate valve from this suit last year to install the vest heater electrical bulkhead, the silicone was almost perfect on the suit. So I now thing the silicone 'gasket' created when the valve was installed had degraded to the point the valve was starting to become loose and leak. My work on the valve was interesting for learning purposes, but I now think the actual leak repair was when I reinstalled the valve in the suit with new silicone.
However, my efforts did have one unintended consequence. As part of trying to figure out the problem and fix it, I stretched the small spring about 1/8 inch to cause the cap to press more firmly against the rubber and the seat. Instead of stopping a leak, what this did was put too much pressure on the cup, preventing the valve from auto-dumping at all. Right from the moment I donned the suit I guessed the problem. Scrunching down to vent air caused NO AIR to come out the exhaust valve, and this has always worked before. Pressing the valve still worked, but I was bothered. At the start of the dive, when reaching the valve is very difficult (standing in the water), I had to get my buddy to press the valve to vent enough gas to sink. Once I was submerged, I could reach the valve but still had to manually dump during the dive. This was not fun.
Do not stretch the small spring in the exhaust valve! If you do, you will disable the auto-dump feature of the valve.
Today (Jan 13) I removed the valve workings from both my TLS350 suits to compare spring pressure and ease of exhaust. The new one (stretched spring) was very difficult to blow through, especially compared to the older valve. I 'squnched' the new spring to try and get it back to the same length as the good (older) spring, and was mostly successful. Before I replace the valve workings in the suit, I will try this again and confirm it will auto-dump.
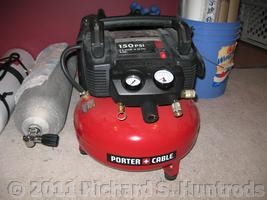
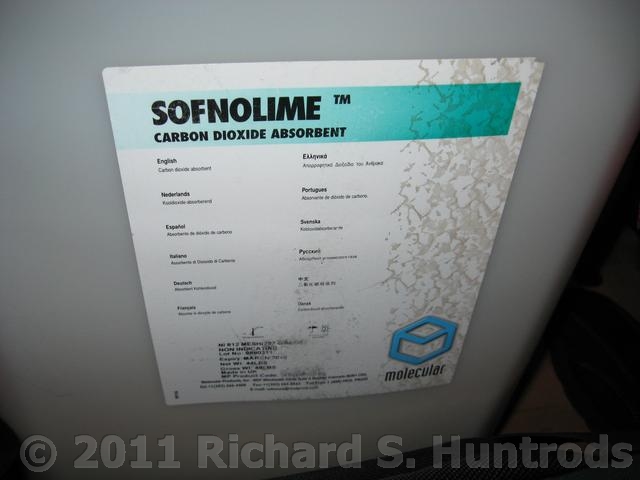
Recently I switched from Grace Sodasorb to Sofnolime, primarly due to availability. Grace was 6-12 size and rather dusty, while the Sofnolime is 8-12 and not nearly as dusty. The Sofnolime is also a harder grained material, and so needs to be packed a bit differently from the Grace. With the Grace, you could only pack so much and so hard, so mostly hand tapping with a bit of bouncing at the very end was all. With Sofnolime, you need to be a bit mor aggressive on tapping and packing from the start. If you aren't, it simply doesn't pack as well. I had to dump my first packing effort after only 3 hours diving as the scrubber started to rattle. Subsequent packings have been much better.
To facilitate the packing, I found an old vibrating base that is commonly used in jewelry casting to remove air bubbles from the plaster investment casting. It turns out to be exactly the item needed to ensure complete packing of the finer grains of Sofnolime in my scrubber.


An update on the heated vest. It took a while, but the battery pack was built and tested in February. It seems to be excellent at both running the vest and keeping it warm for some time. My land test was only 45 min, but it was still heating at that time.
There were some more 'interesting' issues. Rebuilding the Halcyon battery canister lid took a bit of doing as the cord is very small and only one gland would seal. Ensuring all the components were properly sealed also took some care and a bit of Aquaseal. Then it was into the water without the $150 battery to ensure no leaks at depth.
Once that was done, it was time to install the power bulkhead on my drysuit. I elected to us my 2009 TLS350 as that's my preferred suit for diving the Prism. Stuff like gauges and gloves 'just fit right' on that suit and I'm very comfortable with it. My first TLS350 fits well (it was sized when I was over 200lbs) but the arms with new zip seals aren't as comfy as my 2009 XLS suit. Somehow, the bit of extra fabric in the arms makes gauge location just that bit nicer, so the 2009 suit it is.
After checking with DUI and some other divers, I determined the syle of suit inflator (older ones have a pop-off cap on the back), I tried for a few days to remove the nut. Eventually I got it off - it's really just a musclepower thing but it takes enough to be a bit of a worry the first time. With advice from DUI on preserving the silicone 'seal' on the outside, I was able to reinstall the inflator and power bulkhead perfectly the first time.
Note: DUI uses standard silicone sealant (clear) around the inflator valve - a small bead front and back - before tightening down the inflator valve nut. I am pretty sure they do this every time you send in the suit for service (at least for a zipper) as mine came back from DUI with a bit of silicone squeezed out from the inflator that was not on the original suit. The silicone creates a 1mm thick sealing ring on both sides of the suit that keeps water out. Only the outside is critical, but when messing with the inflator it's best to try and preserve both as much as possible. DUI advises if there's any doubt to just add another small bead of silicone before reassembling. I did not need to do that on mine.
Finally, time to put it all together and go for some test dives. The vest is no problem, as it comes outside the poly undershirt and under the main undergarment (my Wheezles). The wire threads through the lower (P-valve) zipper part of the undergarment, or a person can cut a hole in the undergarment for the wire. I used the zipper. Then the suit goes on, being mindful and careful of the wire from the inflator. Finally, both are mated and I shoved the connection and extra wire in my undergarment pocket.
Battery canister goes where the light canister would - right hip. Having not used a canister for some time now,I keep forgetting the 'keeper' - a weight belt buckle to prevent the canister falling off when the Rebreather is removed. OOPS! Once kitted up, the battery cord is connected to the suit bulkhead cord and it's set to go.
Once underwater, I discovered the one thing I really hated about that Halcyon 18W HID canister... the switch is virtually impossible to use wearing drygloves. It's close to the body and the switch guard is so tight to the switch it seems it was designed for 'no glove' cave divers only. The first time I tried it I was totally unable to switch the battery on at all during the dive. Even after the dive, with canister removed and sitting on the tailgate of my pickup I was unable to switch it on wearing standard cold diving drygloves. It brought back many unpleasant memories of that canister!
I checked several sources, and there were two solutions to the (very well documented) problem. One was to add a bit of tubing to extend the switch. The other was to cut a 'thumb groove' into the switch guard. As the first was non-destructive and reversable, I tried that first. On the test dive it proved no better - I still could not switch on. So the next week I grooved the switch guard. I left the tubing extender on, and still had difficulty with the switch on the next dive. Seems extending the switch worked against me. Finally I removed the tubing, leaving only the original switch and the thumb grooved guard. That worked perfectly. It was easy to 'keystone' the switch position and easy to flick the switch with just casual pressure from my thumb.
The best part was the nice warmth that immediately started to flow from the vest to my core, giving me a very enjoyable end to a long (95min) dive. Mission accomplished!


A while ago I got an excellent deal on a used heated vest. It's a rebranded (BTS - Dive Xtras) Typhoon vest, which a very highly rated vest. One of the best things is this vest will continue to work even if flooded with salt water. The vest came with an older, larger Halcyon battery pack (12V lead-acid gel cell) which I found too large for me. In the sections below I will describe the vest and the modifications I made to existing equipment to turn it into a fully functioning heated vest.


On a recent dive, I noticed at the start of the dive while gearing up that the stitching on the right front suspender of my DUI TLS350 drysuit was starting to come undone. As I unzipped the suit after the dive, the suspender was totally free. A suit repair was in order.
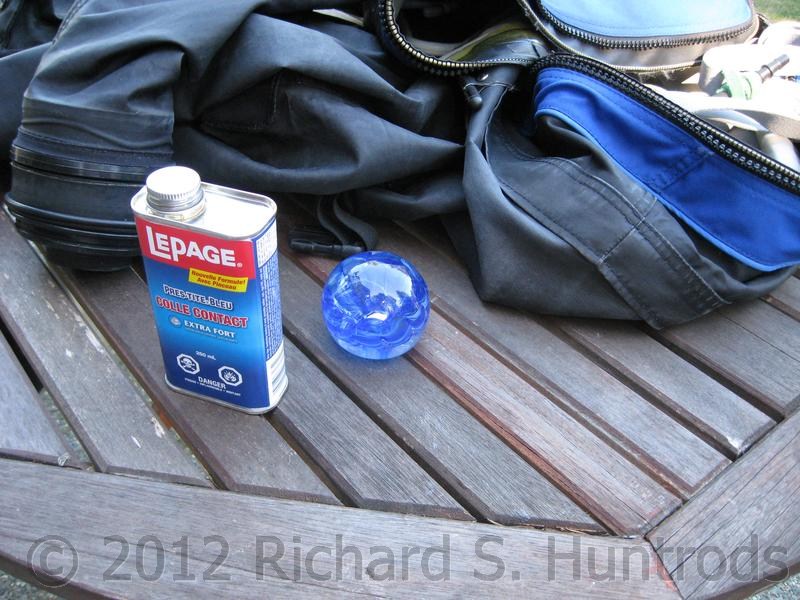
Due to customs taking a minimum of 2 weeks to 'process' any package sent crossing the border, I elected to repair the suit myself. After trying to contact DUI for advice and getting less than stellar answers, I decided to continue my inquiries on various SCUBA internet boards. The results indicated the best approach would be to cut a circle of material, sew the suspender tab to the material and then glue the circle to the suit. The existing circle was well glued to the shiny inside fabric of the suit and offered a canvass-like texture which I was pretty sure would bond well using a standard contact cement. In the end I chose contact cement as I am familiar with it, comfortable using it, and the recommended 'official' glues are not avaliable in Canada.
After cutting a circle of fabric from an old wrecked DUI weight and trim harness, Linda sewed the suspender tab to the circle and I glued it using the contact cement. It's been on one dive since, and so far it is holding up very well.
In the end it also worked out well with DUI as two service persons contacted me through the same forums and apologised for the less than stellar answers, and offered good advice which confirmed my choices. I love my DUI suits and in the end the support people were excellent.


Some time ago I build a tray and handle for my Ikelite underwater housing, which allowed me greater control of the camera underwater. This worked pretty well, but there were drawbacks. The handle was an aluminum bar (1/4" thick by 1.5" wide by 8" long) attached to the housing with steel machine screws. The handle was a section of "loc line" commonly used to hold underwater video lights, wrapped with vinyl to create the handle. The machine screws rusted, the aluminum was starting to corrode under the loc line attachment, and the overall 'feel' of the handle underwater was not optimum. Also, the handle interfered with the housing fasteners meaning it had to be removed to open the housing to insert/remove the camera every time.
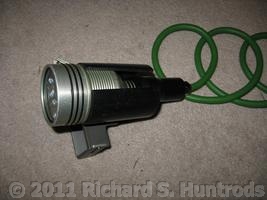
Then this month I purchased a Light and Motion SOLA 1200 underwater video light. This thing is AMAZING! It has enough power to light my videos and even act as a main light source for still photography. The narrow beam is good for signalling or peering into small dark places. The three levels of power allow me to tailor the light and battery life to the needs of the dive. The light is very compact and light, and charges quite quickly. Overall a great addition to the photography gear.
The light came with a loc line attachment, which ended up triggering the decision to remake my tray/handle. Basically, I wanted a more proper handle to hold the loc line. As I was going to build a new handle, I could address the location of the handle in relation to the housing clips. Checking measurements and fit, the new handle would be a single piece of Stainless Steel, 1.5" wide by 15" long (8" + 5" handle + 2" light mount). Tough choice on thickness, but the SS was inexpensive so I bought both 1/4" and 3/16" thick pieces. As it turned out, I was unable to bend the 1/4" SS at home, but was able to form the new handle out of the 3/16" SS without much difficulty.
The final result, including the mounted SOLA 1200 light can be seen below. Now to go for a dive this weekend!


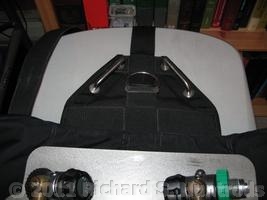
Shortly after my Prism training, I replaced the stock recreational harness with a backplate and wing. This required modifications to some harness elements, specifically attaching the counterlungs to the harness. At the top (shoulders), I used a purchased "Prism counterlung backplate yoke", which has worked perfectly. At the bottom of the counterlungs, I modified the stock adjustment straps to fit on the harness waistband. This has worked very well from 2007 until November 2011.
Recently I've been noticing that the placement of the lower straps can dramatically affect the operation of the diluent addition valve. On my most recent dive, the strap slid to the side while gearing up which resulted in the diluent valve operating every breath. This increased diluent use for the dive. Time for a change.
My buddy Mike Burgess also dives a Prism, also with an almost identical harness. Mostly the differences come down to where we bought our 'bits'. However, Mike did not use the lower straps, but has always used a bungee with dog clips attached to the harness crotch strap d-ring to hold the counterlungs in position. Mike reports this is not only more snug during the dive, but he does not have to adjust straps, and the counterlungs being drawn to the center of the body always sit in optimum position.
As a result, I have now built a similar bungee & dog clip counterlung attachment rig. First dive to test this will be this coming weekend.
I've been using Grace Sodasorb 6-12 since the very beginning with my Prism. This is the sorb that was recommended by the manufacturer and my instructor, so why switch? Well, it's getting harder to obtain, it's very dusty, and it's now about twice the price of Sofnolime 8-12. Mike has been using Sofnolime for some time now, and reports the work-of-breathing (WOB) is unchanged by the switch, scrubber life is the same (perhaps longer), and the cost cannot be ignored. For me, another feature is that Sofnolime is the stuff carried locally and used by every Meg diver in the area. Sounds like a done deal.

I have owned six dive computers and/or bottom timers since I first started diving. I have four of them right now.
Suunto Octopus II
My first dive computer was a Suunto Octopus II, bought in May 2000. It was inexpensive (compared to many in 2000) and did the minimum required for my diving at the time. It would not calculate deco, nor would it accomodate anything except air as the diving gas. In fact, if you did go into deco with the computer, it would simply say something like "stop 20ft" (I cannot recall the exact message) until the computer cleared the deco obligation.
This proved to be somewhat worrying during my TDI Deco Procedures course in 2001 at Sechelt on the Sunshine Coast of B.C. On one of our dives to around 150 fsw, the deco obligation was significant. Other dive computers on my buddy and instructor had long cleared, and we were about to ascend 'anyway' when the Octo II finally cleared. In the end, everyone else had around 5 min. at 20fsw while I ended up spending almost 12. After that dive, I decided that I required a better dive computer - one that could handle Nitrox and decompression.
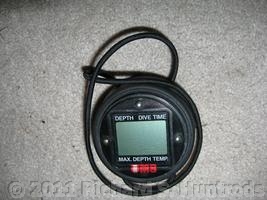
OMS Bottom Timer
For the Deco Procedures course I bought an OMS Bottom Timer as my backup timer. I bought it in March 2002 I still have it. It stays in my dive bag just in case one of my primary computers fails, which has happened on at lease one occasion. What can I say... inexpensive, and it works.
My third device was a Suunto Vyper, also purchased in March 2002. This is a fairly decent dive computer. It can handle Nitrox blends and can calculate and display deco stops using the chosen dive gas. I only sold it when I moved towards the DIR style technical diving and replaced the Vyper with...
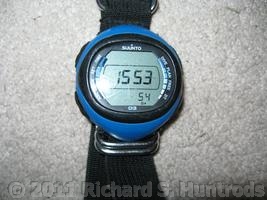
Suunto D3
A Suunto D3, purchased in October 2005. I think this has dive computer functionality, but I honestly don't know and don't really care. The day I bought it, I switched it to guage (bottom timer) mode, and it has been that way ever since. Up until yesterday (Feb 12, 2011), it was my primary timing/depth device on every dive due to the readability of the display and clarity of information. I also very much like the ability to download my dives to the PC and view them. I had to buy the special USB cable, but it has paid for itself over and over.
I continue to use the Suunto D3 as a primary dive guage on all dives. It is my backup to the primary deco computer, a Shearwater Predator.
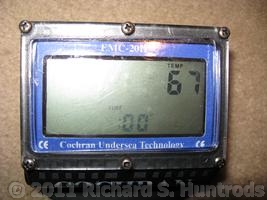
Cochran EMC-20H
My fifth dive computer came 'free' with the spare PRISM Topaz that I purchased from Drew Reed in April 2008. This was a Cochran EMC-20H with Nitrox, Helium and Closed-circuit Rebreather modes. This is the 'top of the line' Cochran, and is a full dive computer able to calculate and display decompression information for either open circuit dives (including nitrox or trimix) and closed-circuit rebreather dives (also nitrox or trimix). Although Drew included it with the PRISM, I ended up spending quite a bit of money after the fact. First, I bought the 'pro' version of the PC software, thinking it would allow me to update the diver info on the device (it does not - only a dealer can do that). Then I spent quite a bit upgrading the memory and battery. This started quite a process, as the engineer said my serial number device could be upgraded, only to tell me it couldn't after it arrived. Joel Silverstein of Tech Diving Unlimited proved to be invaluable in helping me get the upgrade without having to buy a whole new computer.
Unfortunately, the new upgraded Cochran did not behave well. After the very first dive, it blew it's battery cap across Ken's boat! The battery was foaming and I had quite a cleaning job. On the very next dive (new battery, all clean and tested in the sink) it did the same thing. I sent it back, were a very fine hairline crack in the case was determined to be the culprit, allowing salt water to enter the battery compartment at depth. Cochran sent me a new computer. This one worked very well for many months, until I noticed the display was cracking around all the screws that hold it on. I sent it back again, and it was returned as good as new (March 2010). Currently the computer looks just like brand new, and I've been diving it on every dive until just very recently, when the Shearwater arrived.
The nice thing about the Cochran is it has a great (large) NDL display, and calculated deco that has been perfect for me. The only downside of the Cochran is that it's still rather hard to see at depth (as is the D3 and the OMS), and you cannot switch from OC to CC during a dive. That is, you can't 'bail out' to open circuit on the computer if you have to bail out during the dive. The solution according to many is to use 36% EAN as bail out gas, as the deco for that gas is pretty close to the CC decompression when using 1.3 as the bottom PO2. Still, hardly optimal.
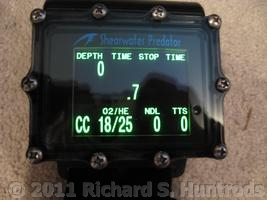
Shearwater Predator SPOCT-SA
My current dive computer is a Shearwater Predator SPOCTSA, purchased yesterday. It is a nitrox / trimix (helium), open circuit and closed circut computer without the Fisher connector (the SA means stand alone). The Fisher connector is to allow connection of the computer to the O2 sensors in the rebreather. Since that is not realistic for a PRISM, the SA (no connector) was perfect for me. It features an OLED color display that is just simply amazing. It calculates deco profiles during the dive for both closed circut and open circuit, so you can bail out from CC to OC at any time and the deco profile is already 'in process'. It's also super easy to program and operate, on land and under water. (the other computers like the Cochran are much easier to program via the PC link and PC software than using the device buttons).
I am currently using the Shearwater PROCTSA as primary deco computer, and the Suunto D3 as my backup bottom timer. It was so wonderful to be able to SEE the computer clear as anything at depth! Both the Shearwater, the Cochran and the Suunto can all be downloaded to the PC, which I really like.
Some longer deco dives demonstrated that the Shearwater GF deco algorithm is excellent and I am very comfortable diving with this computer. I'm currently using the default gradient factors of 30/85, which give a good deco profile compared to the Cochran.
Based on deco algorithm, upgradeability, visibiliy underwater and sheer beauty of operation, it is clear I no longer require the Cochran. Fortunately, it was sold very soon after I posted it on the on-line forums.