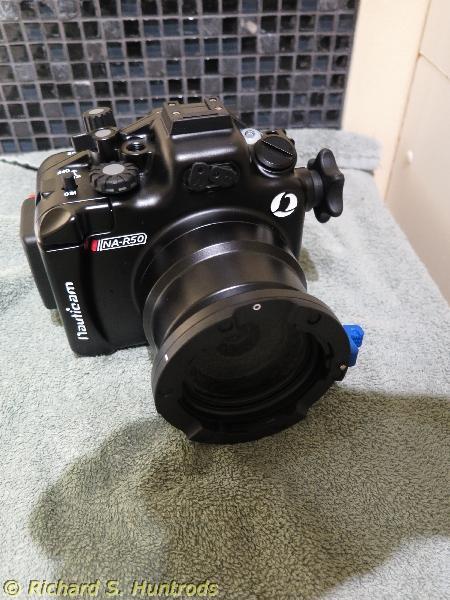
In spring 2023 I purchased a new Canon R50 mirrorless camera and a Nauticam NA-R50 underwater housing.
This review exists because I am always considering new equipment and upgrades to my underwater camera system.
I started taking pictures when I was quite young, but really began serious photography in the mid-1970s when I bought my first SLR camera - a used but complete Voitlander 35mm camera and lenses. Thus began an avid photographic journey which ended up comprised almost entirely from the Canon line of cameras. My first was the venerable AE-1, but my favorite film camera was the 35mm Canon T70.
After 2000 I started looking into digital photography. After a few early ventures, I again moved to Canon with the EOS 40D and several very good lenses. I have kept the lenses and upgraded cameras along the way culminating in the new mirrorless line. The beauty of keeping things "in the family" is that the lenses I bought with the 40D still work with today's cameras.
Along the way I started diving, becoming certified in 2000. By 2001 I was interested in underwater photography, but simply could not afford what I wanted, which was the Nikonos V 35mm camera. Instead I started with something inexpensive and available before quickly arriving at the Canon A570IS with Ikelite housing.
I upgraded to the Canon G16 and Ikelite housing as soon as the G16 came out, adding a strobe to my system. Eventually I started looking for a replacement as the Ikelite housing was quite bulky, and by then I was conducting technical dives involving a scooter (DPV). The housing was slowing me down, and the strobe and sync cord got destroyed by one encounter with the prop.
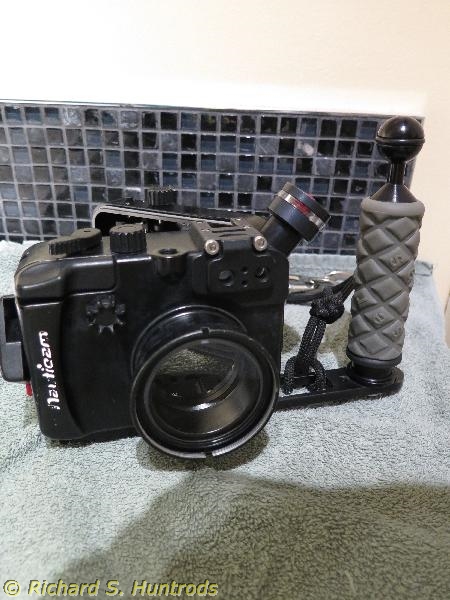
My G16 Housing
In my desire to find something more compact, I explored other options including optical strobe and the wonderfully small Inon S2000, which I still have.
During this time I managed to find a used Nauticam NA-7D housing complete with Canon EOS 7D and 60mm macro lens for an incredible price. It came with twin strobe arms and a pair of Ikelite DS125 strobes (wire sync). This was an amazing system which I still have. The only issue is that it is heavy, both on land and underwater. While I have scootered with it, it's not fun. I also replaced the DS125 strobes with a pair of optical Inon 240Z strobes, which did make things a lot better, but still bulky.
Still, nothing was really satisfying in the compact system arena until I found a used Nauticam NA-G16 housing for my Canon G16. This was a compact, elegant housing that gave new life to the G16. At the time of this review, it has been my primary camera system for underwater photography for many years now. Along the way I added a Kraken 3000 ring light, which is awesome for macro photography, and a Big Blue VTL2600P dive/video light which is also awesome. As a result, I no longer take any strobe on my dives, which streamlines my scooter diving considerably.
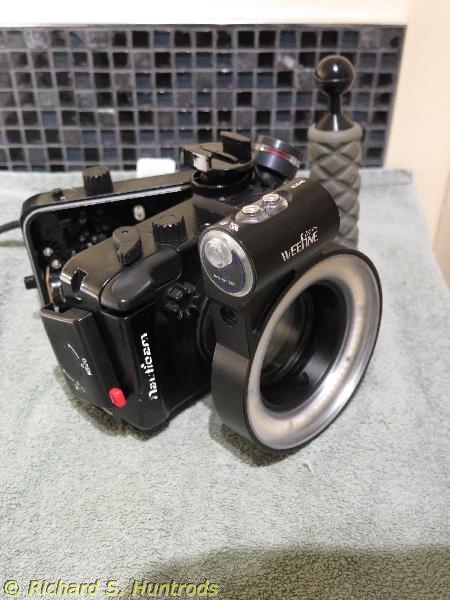
Kraken 3000 Ring Light
As for my diving, I have over 500 dives on open circuit and another 500 on a Prism Topaz rebreather. I have technical training and have done dives to 200fsw (feet salt water) in the Pacific Northwest as well as some Alberta lakes. These days my diving is more fun and generally shallow shore dives.
I dive almost every Sunday in the Nanaimo B.C. area on Vancouver Island, all for fun. Sometimes we swim, most of the times we use scooters as long as the visibility is good enough.
I carry my camera on every dive, because the only really terrible photograph is the one you missed because you forgot your camera.
As mentioned, I'm always on the lookout for new cameras and housings that don't break the bank. Unlike the professional photographer/diver, my camera purchases have to be justified along with a normal household budget. I've been following the new mirrorless cameras and have even bought a Canon R7 to enjoy. That camera is a good balance of features and price, and has been great. Prices on Nauticam housings for DLSR and mirrorless run around $4500 CDN, putting a housing for the R7 just out of my budget.
Imagine my joy when one of the April emails from Mosaik Underwater Cameras featured the new Nauticam NA-R50 housing for the Canon R50, with a Canadian cost of just under $2000. I was immediately interested.
Looking into the camera for the system, the Canon R50 is a very recent addition to the Canon mirrorless lineup. It is a mirrorless successor to the very popular Canon M50 digital. I started searching the internet for specifications of both as well as reviews. Prior to this, I had never really looked at the M50. I did note the lenses were a different format than the EOS lenses.
One immediate advantage of the R50 is the lens port is the new RP port, allowing this camera to use any Canon mirrorless lens as they all have that port. You can also buy a port converter to allow the mirrorless cameras to use any Canon EF style lens. As I already have this adapter with my R7, I can attest to it's worth and function. That means the R50 immediately has access to all my current Canon digital lenses for use on land.
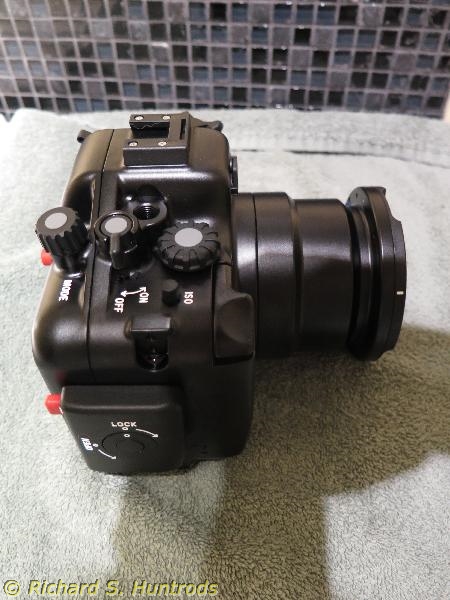
Nauticam R50 Fixed Port
Underwater, the Nauticam housing uses the standard R50 kit lens, the RF-S 18-45mm 4.5-6.3 IS STM Lens. I ordered the camera from my favorite supplier in this kit form. The R50 is a 24 megapixel APC sensor, so it is a crop frame as opposed to a full frame sensor. There is a lively debate among photographers to the benefits of both types, but the matter is far from settled as to whether one is superior to the other in all cases. In general, crop sensor cameras are less expensive than full frame cameras, consequently will be the common choice of the budget conscious. Certainly all my underwater cameras have been crop sensor and I cannot complain about my photos - if only because the cost of full frame and a comparable housing would have placed underwater photography beyond my means.
One of the things almost every reviewer mentions is the awesome focus capabilities of this new camera. In addition to numerous focus points common to most modern cameras, it has advanced features such as eye detection for persons as well as animals. This is something I will definitely be testing once I have the system underwater as I love macro photography of 'critters'.
I won't go into the detailed specifications of the Canon R50 as they are abundant on the internet as well as the Canon website.
After ordering the camera from a the supplier, it arrived. I did film myself unboxing the camera using my GoPro Hero8, but it is pretty lame. Instead I'll focus on my actual thoughts getting the camera.
As mentioned, I own a Canon 7D (mk1) for my big Nauticam underwater housing, and a Canon G16 for my compact Nauticam housing. I also have a new Canon R7 for land use. Overall I have a pretty good sense of 'how big' cameras are.
This camera is tiny. I was actually surprised how small the camera is fresh from the box. Compared to other Canon cameras I have, it's tiny compared to the 7D, and smaller than the R7. Compared to the G16, which is designated a compact camera, it's a bit larger in width and likewise a bit deeper, but overall looking at the two the R50 gives the impression that it is a next generation compact rather than a new mirrorless.
With the 18-45mm kit lens on, it's deeper still, especially compared to the G16, but still gives off a 'big brother' vibe.
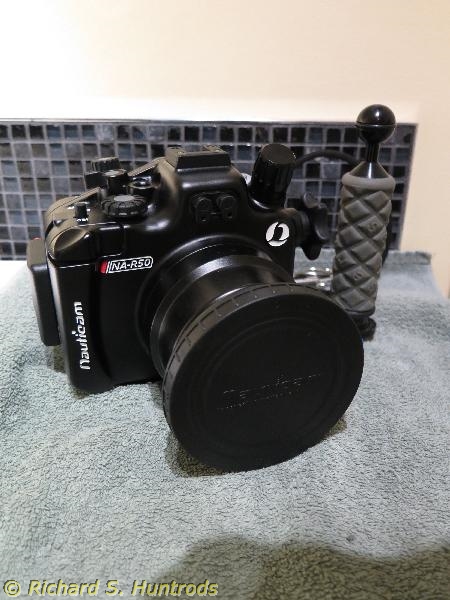
Compact Canon R50 Nauticam Housing
The 18-45mm lens what I'd call 'super manual'. It stores compact, and you must rotate the zoom ring counterclockwise (when holding the camera) to move it from 'storage' to 'usage' position. You cannot use the lens in storage position, which turns out to be one of the first cool things I discovered when I first turned on the camera. More on that in a moment.
First, I put the battery in the charger, and let it charge. The battery is smaller than the standard DLSR/mirrorless battery in larger Canon cameras, but just a slight bit larger than the G16 battery. In other words, it's different, but does remind me more of the G16 battery than anything else.
I installed the kit lens, which is 'straightforward Canon' meaning easy if you've owned any Canon SLR, DLSR or mirrorless. I held the camera and it has a great feel in my hands. Some reviewers complain that the camera is too small for their hands, but for me it felt perfect and I don't have small hands.
With the battery charged and an appropriate SD card inserted, I started checking out the camera. As I will always be composing photos in the housing using the back LCD screen, I moved it out and reversed it from storage to viewing position.
The first thing the camera does when powered on is the back screen displays the message 'Set the lens to the shooting position'. As noted earlier, the lens is stored compacted, and must be extended to work. The camera simply will not proceed until you have this lens in working position. This message does not appear with other more normal lenses.
After opening the lens, the camera displays a setup screen for language date and time. Once set, you can modify many parameters using the menus. The back screen is a touch screen so outside the housing this could be handy, but as I'll be using the housing most of the time, I won't bother with touch screen.
The default is a kind of super-auto mode, but I am used to using either Tv, Av, P or M in my photos, so I moved the mode dial to P (Program) to try a few shots and later to explore the many menus. It is recommended to use a setting like P when setting menu items as they are context sensitive, and advanced modes make decisions for you, so the most shooting options are available in a mode such as P.
I tried taking shots using various zoom settings as well as flash and the Tv (shutter priority) and P (program) modes. The top dial works as I expected for a Canon camera. The flash is also 100% manual - it does not have a button 'pop up' but must be raised with fingers. This should not be an issue underwater as I currently prefer to use a powerful video light and ring light with Tv mode (typically 1/250 at ISO 800 or auto) and no strobe.
One thing I had to set up after the first few shots was to change the default 'L' picture storage to 'L + RAW' which I prefer. I always take RAW photos and use a program such as Lightroom to play with the results while using the JPEG photos for my website.
After a couple of days playing with the R50, I have to say I am incredibly impressed with the little camera. It's more than capable, and really feels like the natural successor to my G16. At the same time, it doesn't feel like some 'cheap toy' entry level camera compared to a DLSR or the R7 mirrorless. It just feels right. I quite like the lens, though I'm not overly thrilled with the 'Set the lens to the shooting position' stuff. I may end up leaving the lens 'out' all the time as I feels 'fiddley' otherwise.
In my other tests, checking macro capability, I found the lens focusses at 8in at 18mm focal length, and 14in at 45mm. I'll test this more completely once I have the housing and go underwater, as this is where the macro will really get a workout.
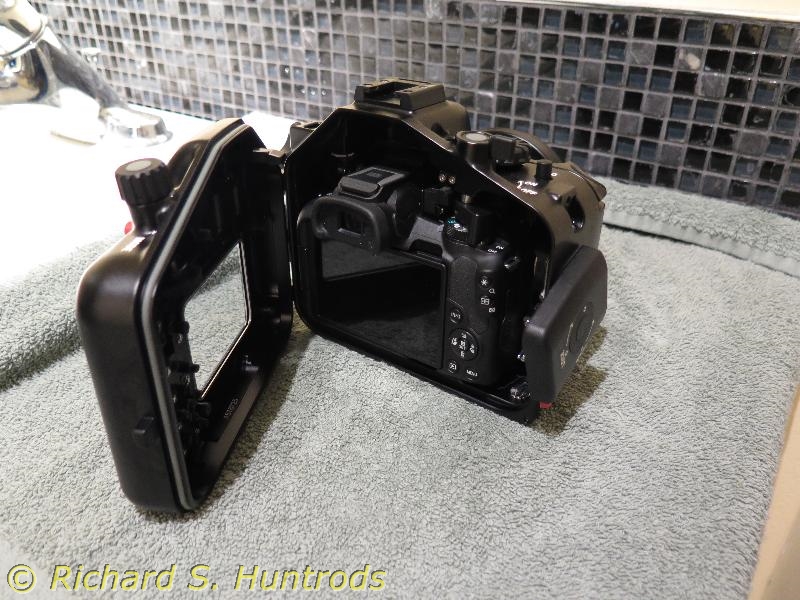
The Canon R50 inside the Nauticam housing
I took a variety of photos, and continue to play with the menu settings. One setting I love is the "Q" or quick menu. Using that, I can quickly change ISO, metering mode, and (for me) the focus selection. Normally the default "whole area" autofocus is great, but for macro shots I prefer spot metering. With the quick menu it's easy to switch between the various autofocus modes.
My work flow is somewhat convoluted, as I use the older stand-alone version of Lightroom for all photo editing and adjustments. As a result, newer RAW formats such as the Canon CR3 format (.cr3 files) cannot be read in this older version of Lightroom. Those who use the subscription version will not have this issue. It is easily resolved by downloading and using the Adobe DNG Converter program, which is free and available for both Windows (10 & 11) and Mac OS. I made sure to upgrade to the latest version (15.3) although Adobe reports 15.2 will work with Canon R50 files. It easily converted my images from RAW (.cr3) to Adobe DNG format. The converted files imported easily into Lightroom.
Overall I am extremely satisfied with this little camera. I am very much looking forward to the arrival of the Nauticam housing and underwater photographic adventures.
Usually before I seriously consider buying a housing, I download the manual from the manufacturer's site and study it. In this case, the housing is new enough such that the PDF manual is not yet ready. However, I downloaded the NA-M50 manual and also have the NA-G16 manual for my G16 housing, and there are enough similarities to provide good information.
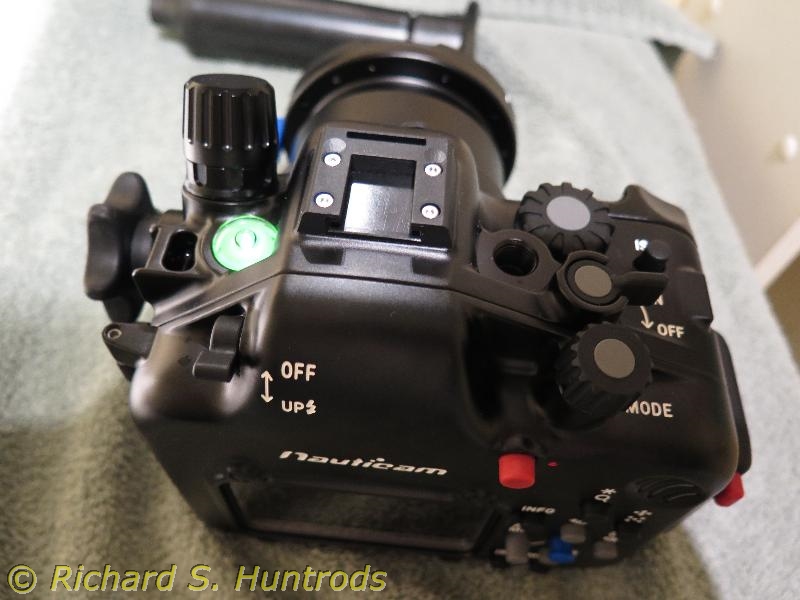
The NA-R50 housing has a built-in water intrusion alarm, and circuitry for a vacuum leak detection system.
The vacuum system requires purchase of a separate port, plug and manual pump. At first I didn't buy the vacuum port as it's a bit pricey and I thought I could adapt my Leak Sentinel as it has the same port opening. In the end I decided I'd rather just go with the complete system from Nauticam for this new system and bought the port. I was quick enough that Mosaik will include it in the housing shipment, saving me shipping costs.
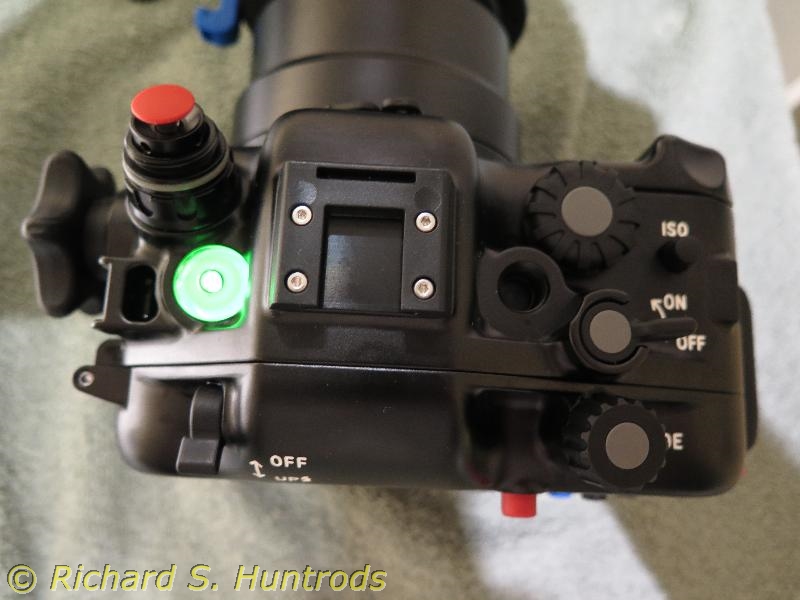
Nauticam Vacuum system
The housing has one fixed lens port, like the NA-G16 housing, and a similar clamshell back with swivel locking mechanism. I've been using the almost identical configuration on my NA-G16 housing, and find it very secure and easy to use.
The housing arrived in mid-May, and the packaging is awesome. The housing comes shipped in a very heavy duty carton which snugly holds the Nauticam camera box. Inside the Nauticam box there is a soft durable nylon (or equivalent tough fabric) housing case, which snugly holds the actual housing. The housing is sent closed, and in the case in a zippered mesh pocket is a plastic bag containing the accessories: a set of allen wrenches, a tube of o-ring grease, an o-ring removal tool, a spare o-ring and a manual card in a small black envelope. The entire package clearly states "This is Quality".
Removing the housing from the case revealed a superbly finished housing in black matte aluminum with all the controls needed to easily control the camera underwater. Having owned Nauticam housings before, as well as Canon cameras, everything was laid out exactly where I would expect it.
The only thing missing from my order was the vacuum port, which was shipped from Nauticam but not yet arrived. Once I have that I will dive the camera, but until then I'll becoming accustomed to the camera in the housing on land.
The manual is now available via PDF downloaded from the Nauticam website, and after saving it I read it completely. It is detailed and excellent, as all my Nauticam manuals have been. The only custom setting recommended for the camera that might be different from a land-only use was a note to set the screen from "Auto 1" (use screen when open but use viewfinder when detecting someone near) to "Screen" (use screen at all times). This is because the viewfinder is blacked out on the housing and would otherwise attempt to switch to viewfinder as soon as the back is closed. I confirmed this while playing.
One thing I learned from the manual that has not been clear simply viewing housings on the Nautcam website is the use of the blue lever at the end of the housing port. The manual shows that it is a release tab for the new (to me) Nauticam bayonet system for wet lenses. In normal use it does not interfere at all.
Everything on the housing is exceptional quality.
After reading the manual, I installed the camera in the housing, being careful to note the warning / instructions regarding careful placement of the on/off switch. You pull this lever up before inserting or removing the camera, then push-click it back into place before closing up the housing. As always, it's a good idea to confirm operation before closing up the housing.
With the camera in the housing and the housing closed, it was time to play. Operation is exactly the same as with the camera outside the housing, except everything is done remotely using the buttons and controls. I was pleased to find the lens can be opened or retracted using the zoom knob while in the housing, which means you'll never lose photos because you were in a hurry and forgot to open the lens before use. You still have to remember to remove the lens cap, but that is something one can avoid simply by taking a photo with the complete setup before you pull the vacuum or head for the water. I never want to have to open my housing at the dive site as there's too much risk of spray or debris entering the system.
All the controls worked exceptionally well. The only thing I found different from land use was the half-press of the Nauticam shutter is a bit stiffer than just pushing the button on the camera. However, this is something I've found common with both my NA-G16 and NA-7D housings, probably caused by the mechanism of the shutter lever vs. the simple button of the camera. I had no trouble using half-press to set focus and see my photo settings at all.
The essence of a great housing is being able to use your camera and all its features as if you had the camera only. This housing fulfills that easily. On land, the weight of the aluminum housing does make you realize the difference, but the housing is easy to hold and feels good in the hands.
Before I dive I will be adding a small aluminum tray with a single handle with ball mount and bungee cords for tethering and securing the camera.
Even though I've only had the new NA-R50 housing for a couple of hours, there are already a couple of minor points that I don't like.
The first and most significant is that there is no threaded mount on the end of the port. My NA-G16 has an M67 threaded port, which allows me to attach an Inon macro wet lens, or my Kraken 3000 Ring Light. Both have M67 threaded mounts that attach easily to the NA-G16 port. Likewise my NA-7D in macro mode uses a macro port (as opposed to say a dome port) that also has the threaded M67 mount.
The new NA-R60 has no threads at all. Instead, there is the new Nauticam bayonet mount system for attaching accessories like wet lenses in a quick-connect fashion. I love the concept of the quick-connect accessory attachment, but wish they would have included the M67 threads as well. All is not lost however, as I quickly found bayonet adapters on the Nauticam site which are fairly reasonable in price. For example, the M67 to bayonet adapter is under $78 CDN at the time I write this. Unfortunately it's a special order, meaning a few weeks at the earliest before I can use my Kraken 3000 ring light with the new housing.
The second minor issue I have is with the fantastic padded case. It fits the housing perfectly and is a great protection for the housing when travelling. However, if you attach a tray with handles, or the special optional accessory handles sold by Nauticam for this housing, there is no way the housing plus tray and handles will fit into the case. For me, that's sad.
One Solution to the M67 Thread Issue
Mentioned earlier, the solution to the lack of M67 threads on the housing is to purchase the Nauticam bayonet adapter, found on the Nauticam and Mosaik websites as 'Nauticam - NA-83214 - Bayonet Mount Adaptor for SMC/CMC Lenses'. The part is exactly what is required to mount any M67 lens or ring light to the housing. I purchased TWO as I would like the option of taking both the ring light and Inon macro lens on a dive. It is simply not feasible to use M67 thread mounts underwater with dry gloves in our cold Pacific waters.
To be sure this was going to work and before I bought the adapters, I installed the R50 in the housing and then hand held the Inon macro lens to the port. It works perfectly.
I've been using the housing with the camera installed for several days now, and absolutely love it. What I have not yet done is a water test, or any usage tests using my dry gloves.
Today the Vacuum port adapter arrived. As with the housing, it comes with a printed card with a link to download the product manuals. I downloaded the manual for the "25625 M16 Vacuum Valve II (Pushbutton Release)". Installation is very straightforward, but before I begin it is time for some water immersion tests.
First I removed the camera from the housing, then pulled the plastic battery saver tab and turned on the electronics. As shipped the housing has a moisture alarm, which was then enabled. The indicator light on the top of the housing glows blue when turned on, then flashes blue periodically. If a damp cloth is touched to the water contacts on the bottom of the housing, the alarm beeps loudly and the light turns red. Removal of the damp cloth resets the alarm.
I closed the housing with no camera but moisture alarm active, then immersed the housing in a bucket about 18in tall. It required a 2lb soft weight on the housing to keep it down when empty.
I left the housing immersed for 2 hours, then dried it off and checked it thoroughly. All was well. I then repeated the test with the camera installed in the housing.
For both tests, I did not otherwise touch the housing, so the vacuum port was not yet installed.
After successful completion of both immersion tests, I carefully dried the camera and opened it to ensure no water incursion. At this point I also turned off the housing electronics to save battery.
Using a toonie (large $2 Canadian coin) I carefully unscrewed the M16 port cap from the housing. I followed the instructions with the vacuum valve (obtained online from Nauticam) using a bit of grease as per directions. This involved removing the port cap, then using the supplied tool to secure the vacuum valve in the M16 opening on the housing.
It looks and fits great. I turned on the housing electronics then sealed the housing. Following directions, I used the pump on the vacuum valve to pull a vacuum; the light was yellow while pulling vacuum, and green when vacuum was achieved. It's quite simple. I then replace the valve cap which seals the valve.
I waited 30 min, again as per directions to ensure the vacuum was stable, then immersed the housing with camera again for two hours.
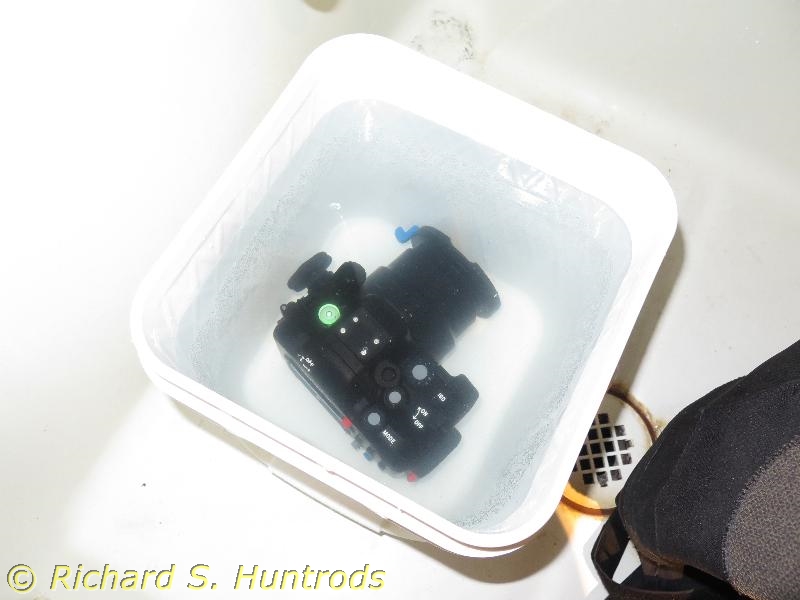
As someone who swears by the use of vacuum detector on any expensive camera and housing, I really do love the way the vacuum valve and built-in electronics works on this new housing. It is definitely worth the extra cost of the vacuum valve for the peace of mind knowing the housing seals are good before and during the dive.
The only thing I'm missing for diving the new NA-R50 housing is the bayonet M67 thread adapters I've ordered, but I can dive without them; just no ring light or macro lens. I can live with that at this point.
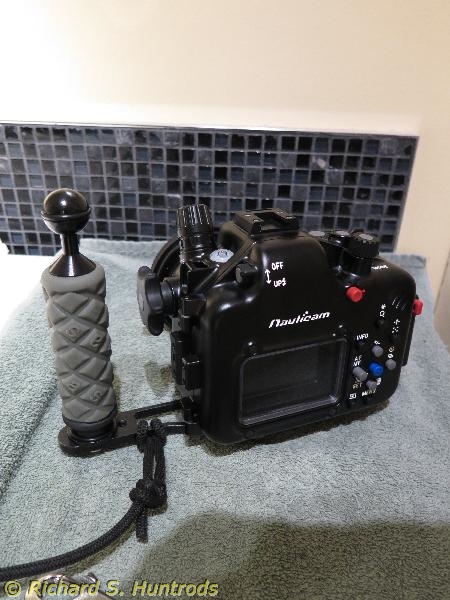
Final preparation for diving is to move the tray with left handle from my NA-G16 housing to my NA-R50 housing so that I can clip the housing off and hold it securely. That was done with no issues so now the next thing is a first dive with the housing and Canon R50.
I took a few photos of the NA-G16 housing with and without the Kraken 3000 ring light, and before and after I removed the handle tray. I also took some photos of the new NA-R50 housing before and after the handle tray was installed.
This handle tray is something I received gratis with the pair of Inon Z240 strobes I purchased used a few years ago. In addition to the strobes and spares, the deal included a nice Pelican case with some extras inside, including this really nice aluminum housing tray with dual handles. One side can be detached giving a single handle tray, which is what I have been using on the NA-G16 and now the NA-R50. I have no idea who makes the tray, nor the cost to replace it, but it's extremely well made and the handles with 1in ball mounts are among the best I've ever seen or used. The open framework on the tray allows me to attach a roughly 12in by 1/4in bungee cord which clips to the upper right D-ring on my backplate harness at all times, and a second clip safely holds the camera close to me when I'm not taking photos.
I have used such bungees with every housing I've ever owned, and it's saved me from disasters such as dropping the camera on many occasions. Diving in cold water with dry gloves is not always easy.
The camera and housing were almost ready for my first dive with the new system. On the morning of the dive, I opened the housing and turned on the electronics, then carefully closed the housing. I used the hand pump to pull a vacuum until the light was steady green. At this point the camera in housing sits in a small clear plastic bin until it gets loaded into my Tacoma with the rest of my gear and I head to the dive site.
The first dive was at Chemainus B.C. at the Kinsman boat ramp. It's a great shore dive with ample parking and a great entry using the boat ramp, of course being careful of boats and observing proper courtesy. Gearing up for Pacific Northwest diving means drysuit year round as well as good undergarments, hoods and dry gloves with liners. I was diving a single 120cf steel tank today as we weren't sure of the visibility. The last several weeks have been horrible, with visibility around 2-5 feet due to muck in the water at all depths.
Today the visibility was 20-30 feet, which was glorious. There was still 'snot' in the water but it was so much better than past weeks. The tide was very low and falling, but the day was warm as was the water.
We swam along the edge of the eel grass until we reached a landmark, then headed to the first of four sunken dry docks that have become a haven for small life. From there we headed north to a small wall, then along to a deeper wall.
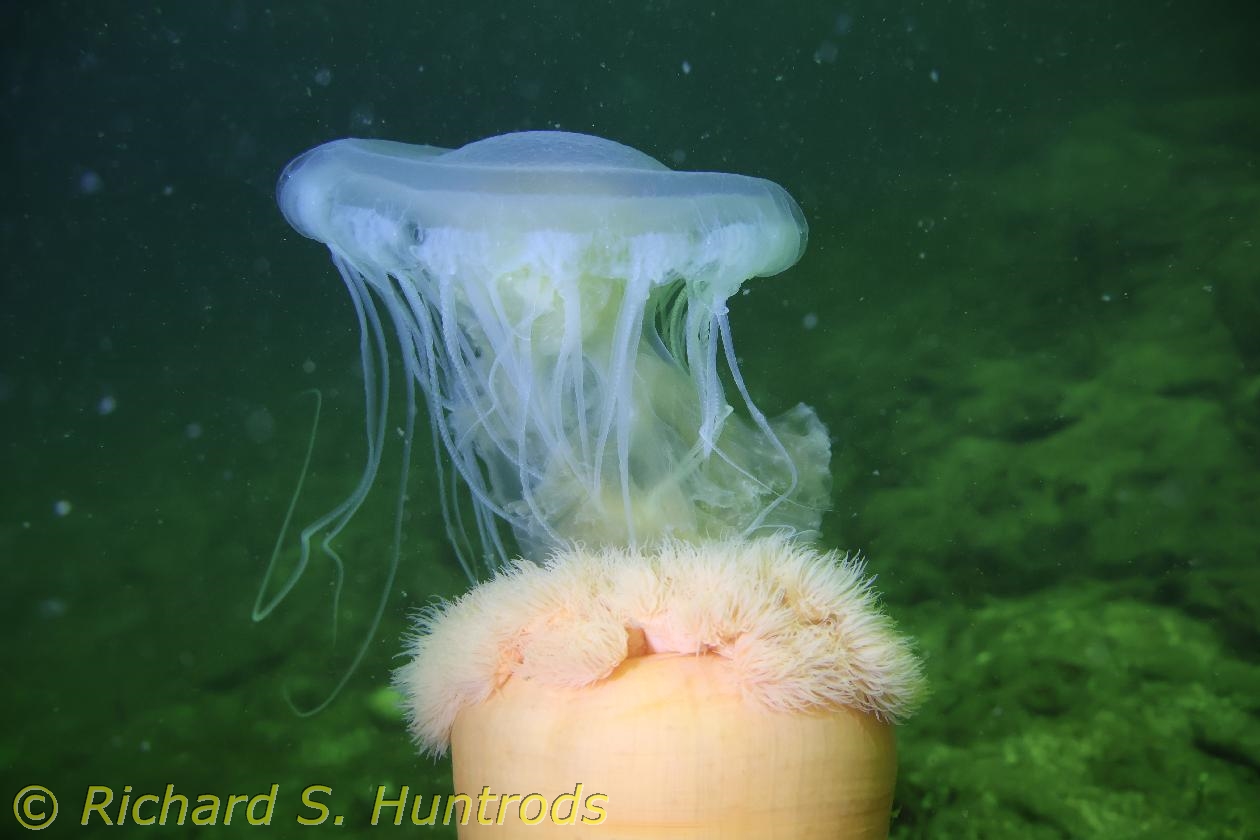
Along the way I took many photographs, mostly using natural light due to the sunlight and low tide depths. For close shots I used my Big Blue VTL2600P in flood mode. This light is my primary light and I use it in spot mode for diving and flood mode for photos and video. I mounted it on an aluminum goodman handle and it's awesome.
The camera was easy and intuitive to operate. Essentially it was very much like my Canon G16 in the Nauticam NA-G16 housing that I've been using for the past three years. Everything works exactly as expected, and everything was familiar.
The only real difference between NA-R50 and NA-G16 was the presence of the zoom wheel near my left hand. Again, it was intuitive and easy to operate.
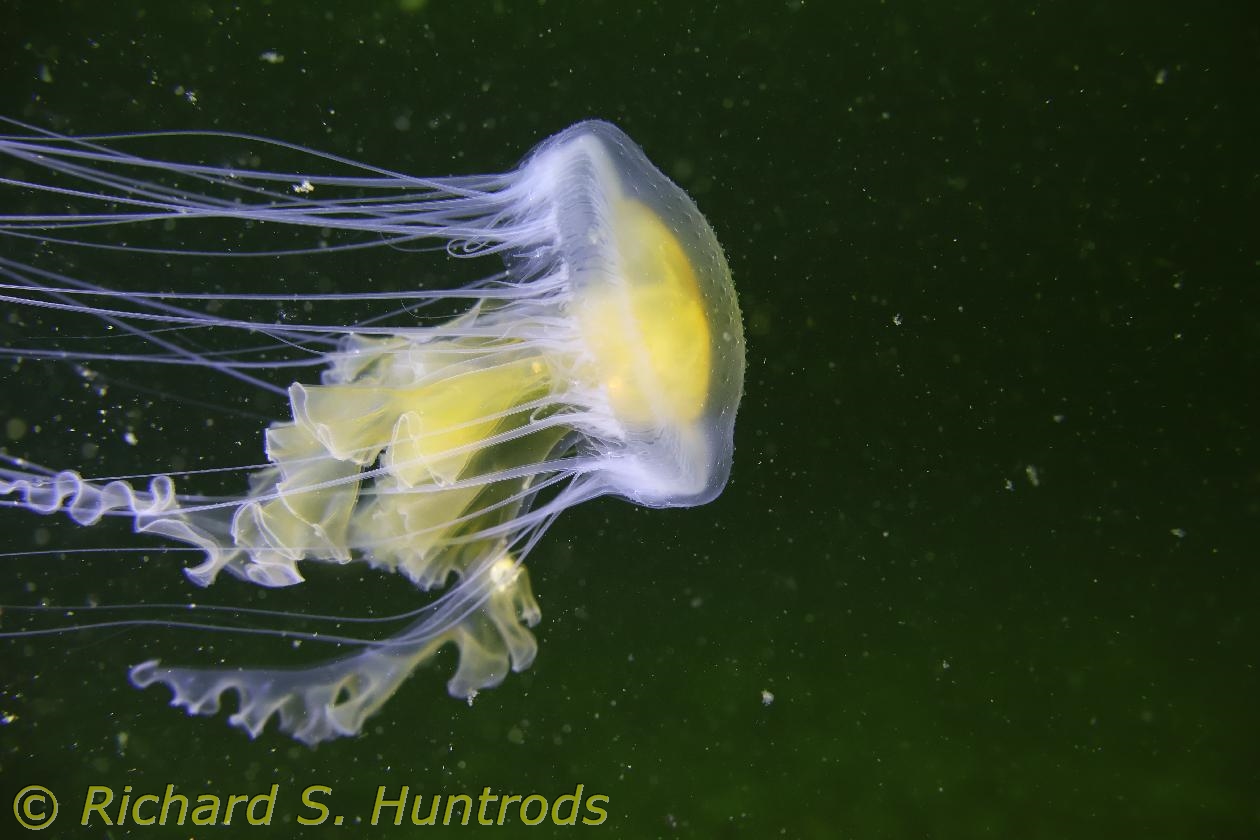
In addition to over 200 photos, I took several videos. Especially wonderful was discovering slipper eels laying eggs near the end of the dive. I took quite a bit of video as well as many photos of them as they are so lovely to watch.
There were two things that I did not like about the Canon D50 during the dive, but I already knew I could fix them post dive with the menu system. In fact, I could have fixed them during the dive as the full menu system is available using the well placed buttons, but it's distracting to mess with a camera when you are diving and you will miss good shots. Instead I decided to wait.
The first 'irritation' was that I'd set the camera drive mode to multiple-shot low speed mode as opposed to single shot. On land cameras this is ideal for me, but underwater with the trigger lever being just a bit stiff I kept shooting double shots when I wanted one. This is an easy menu fix which I did immediately after the gear was rinsed and the camera out. Some people might love this feature, but I personally find it annoying and so fixed it.
The second irritation was really more annoying, but again easily fixed after the dive. The default screen behavior is to dim the screen after 10 seconds. Pressing the shutter halfway immediately restores the screen to full brightness, but I really hate this when diving. I want that screen ON. The fix took a bit longer as it's not the screen menu, but the power menu that adjusts this. I set it for 'screen dimmer 30 seconds' and 'power off 1 minute'.
The other thing I set up afterward was placing both drive mode and power settings on to the 'my menu 1' custom menu. I leave the camera menu system set to this menu so I can change important items quickly underwater. I also have 'battery info' and 'movie rec size' on this menu as these are things I might want to use quickly underwater.
Otherwise I use the quick menu (center button) to quickly adjust important settings for the shooting mode.
Mostly I used Tv or shutter priority on my dive. I have used this setting on my G16 for years and prefer it as it allows me to control shutter speed, which I use both to stop motion as well as to control background contrast. My usual speed is 1/250 which I've found to be a great overall setting for getting quick shots as well as more deliberate shots with the Big Blue light.
As mentioned before, I shoot using RAW+JPEG format (large JPEG) as it allows me to quickly view the photos and also process later.
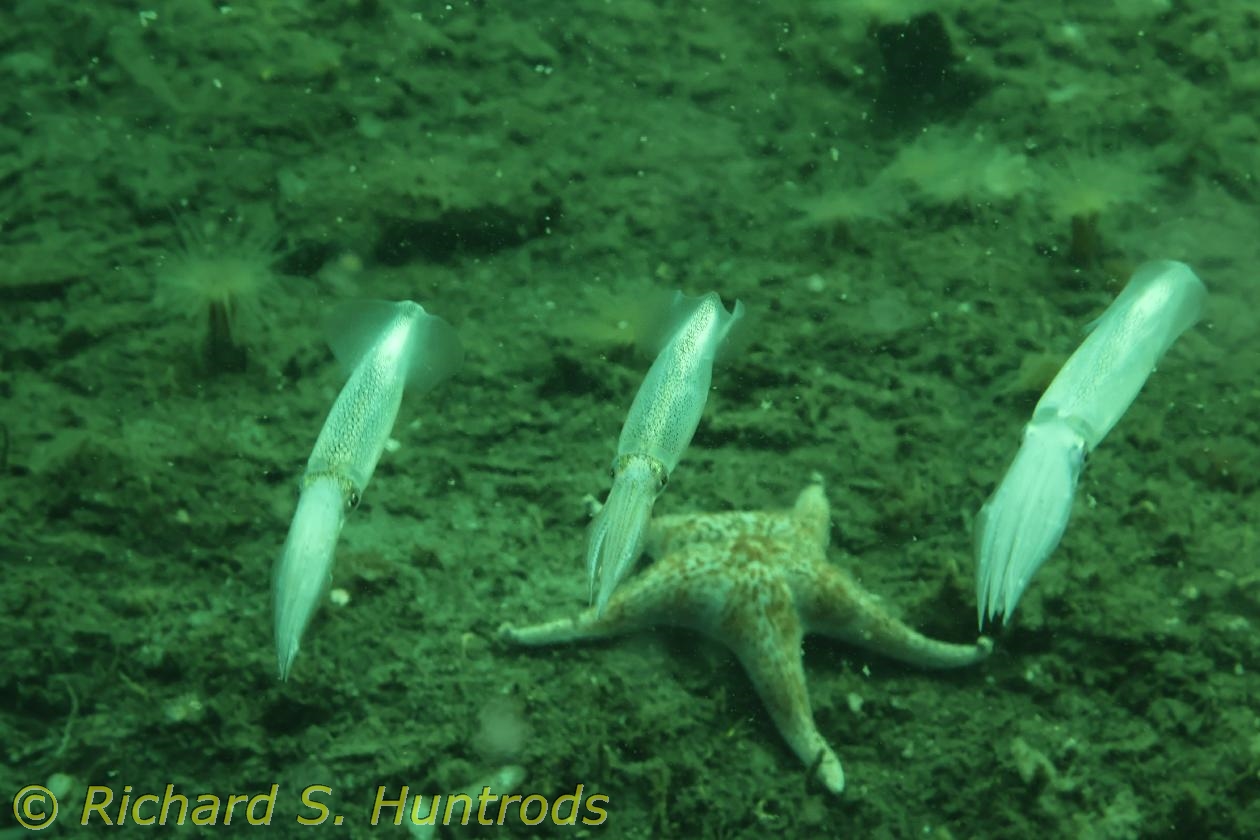
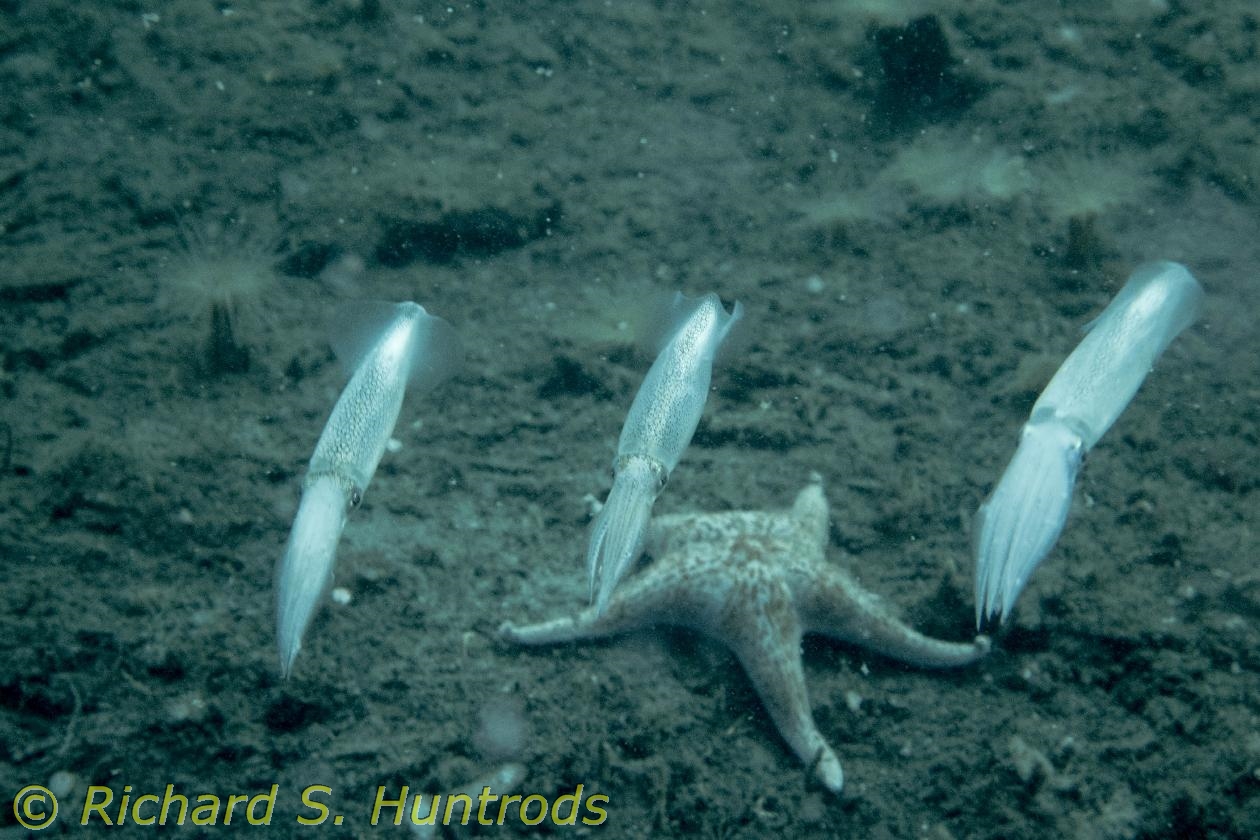
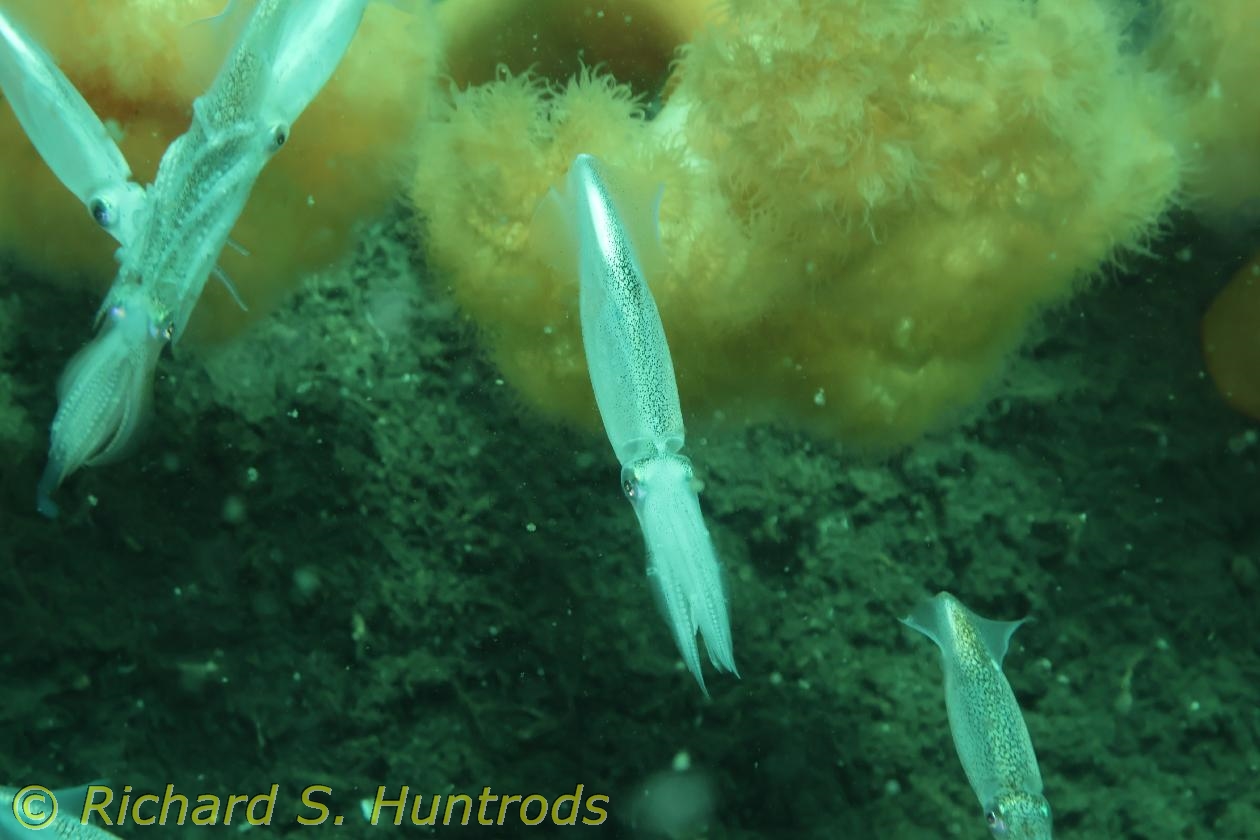
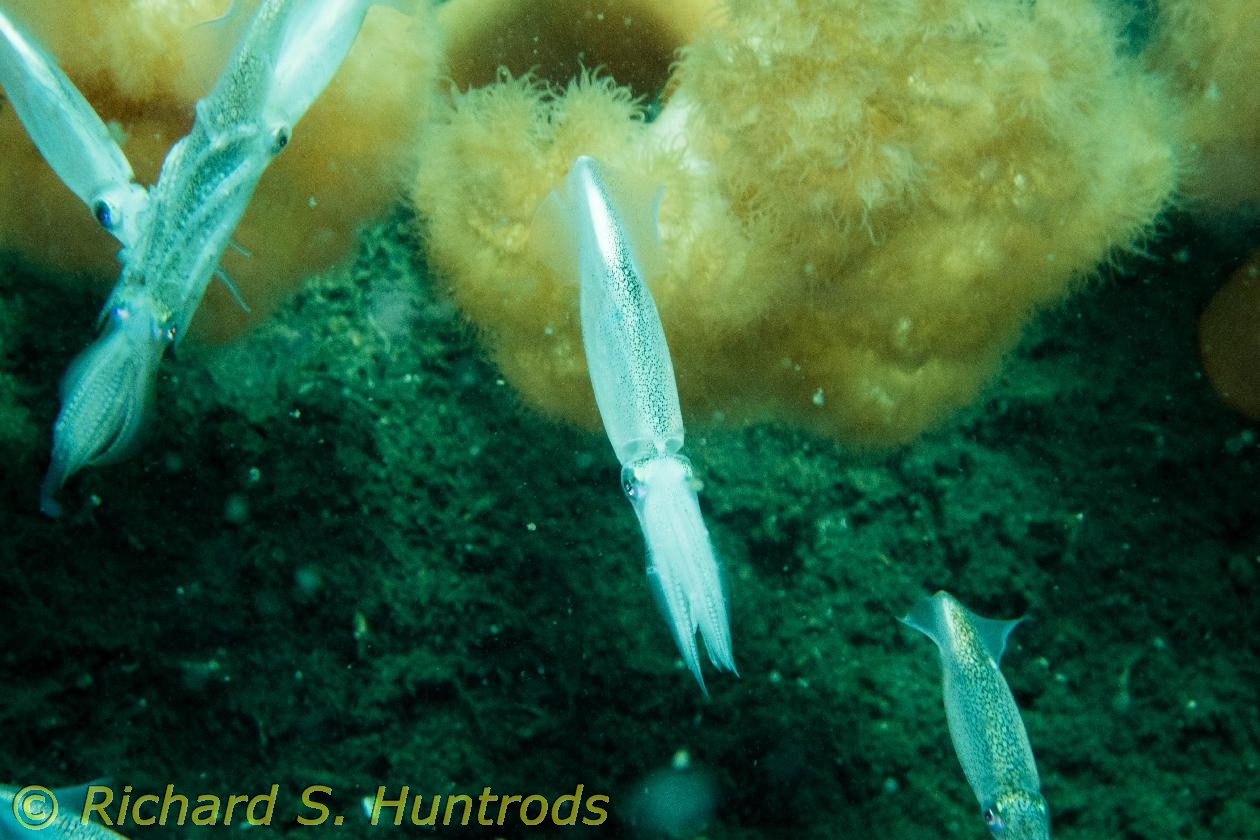
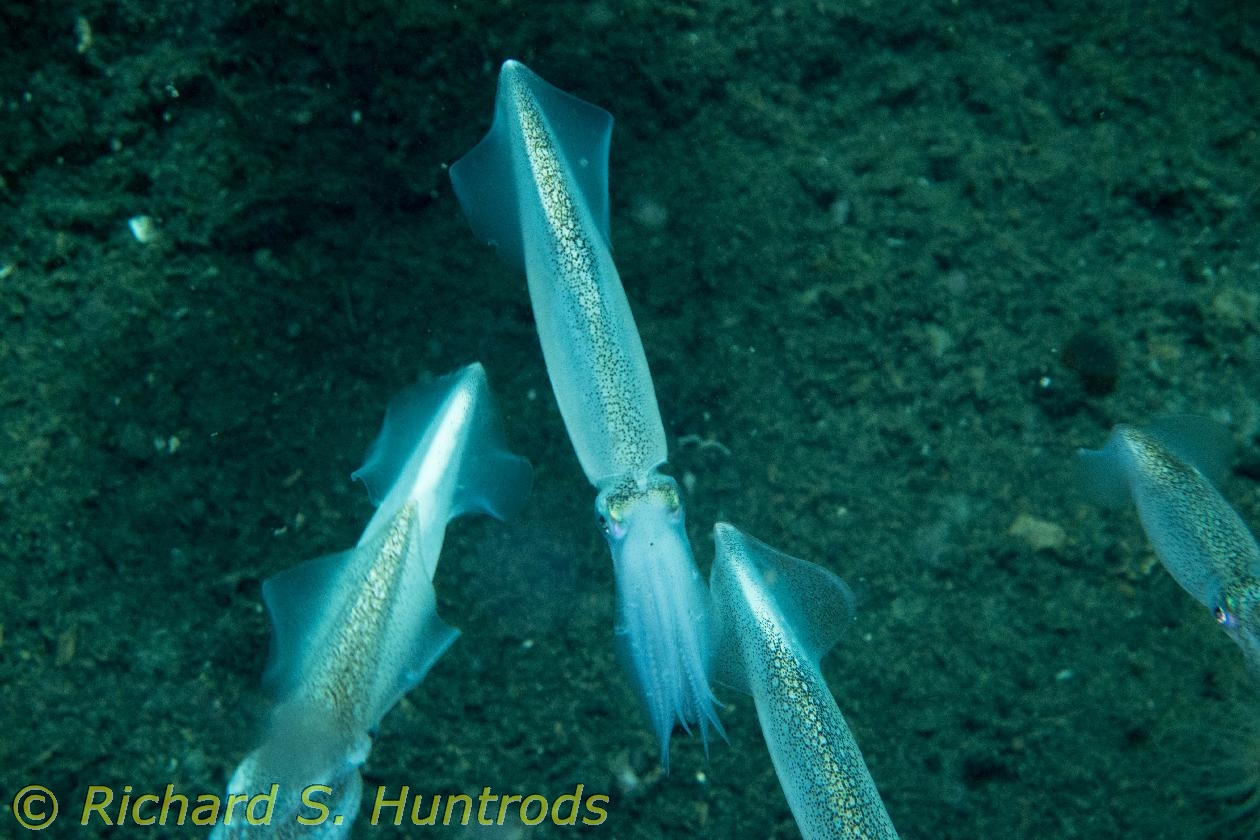
After weeding out duplicates and blurry photos, I ended up with 98 pictures that were decent to very good. Some of the squid shots I absolutely love. The squid video also looks great after I edited the clips together using Adobe Premier Elements 15. The video was taken using 1080p at 60 frames per second, which is a format I like and also extends battery life compared to 4K.
I store my raw photos in Lightroom 6, but as I won't pay for the subscription and the R50 has a new RAW format, I first process them from .cr3 to .dng format using the latest Adobe Negative Converter.
I was impressed by the overall tone and clarity of the photos, even straight out of the camera in JPG form. I was even more impressed by the quality of the RAW images.
My overall impression of the Canon R50 is that it's an awesome camera; essentially a great entry-level camera that is a clear step up from 'point and shoot' or compact cameras while still being very affordable. It features excellent specifications, great price point, and the benefit of the R system of interchangeable lenses compatible with the entire Canon mirrorless lineup.
The Nauticam NA-R50 housing turns this excellent little camera into a stellar underwater photo system, with all the bells and whistles of the much more expensive Nauticam housings for the more expensive Canon mirrorless lineup tempered only by the lack of changeable underwater ports and lenses.
Unlike the bigger and more expensive housings, this housing is very compact, meaning you can take it on every dive without thinking about what else you have to bring. It really is an outstanding underwater system.
On price alone, the Canon R50 + Nauticam NA-R50 really cannot be equaled at this time. It's an awesome duo that I totally recommend.
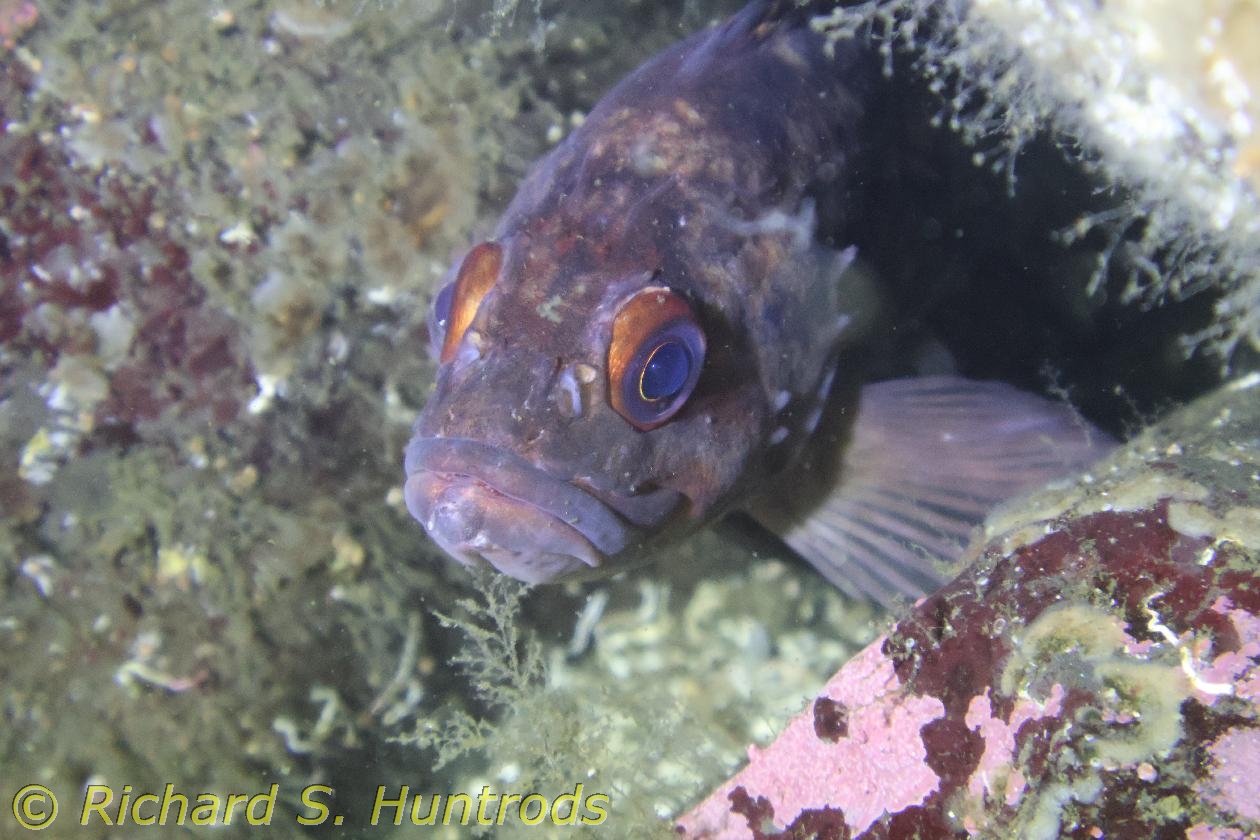
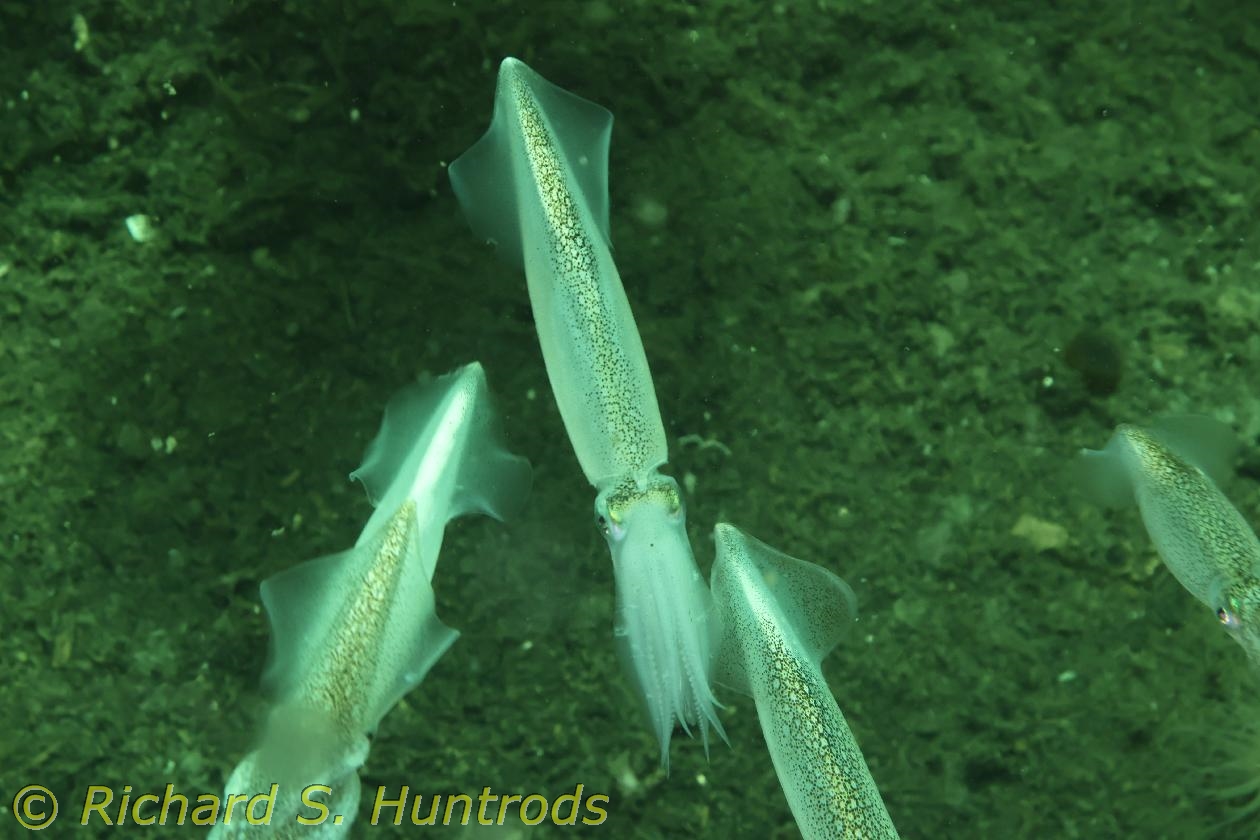
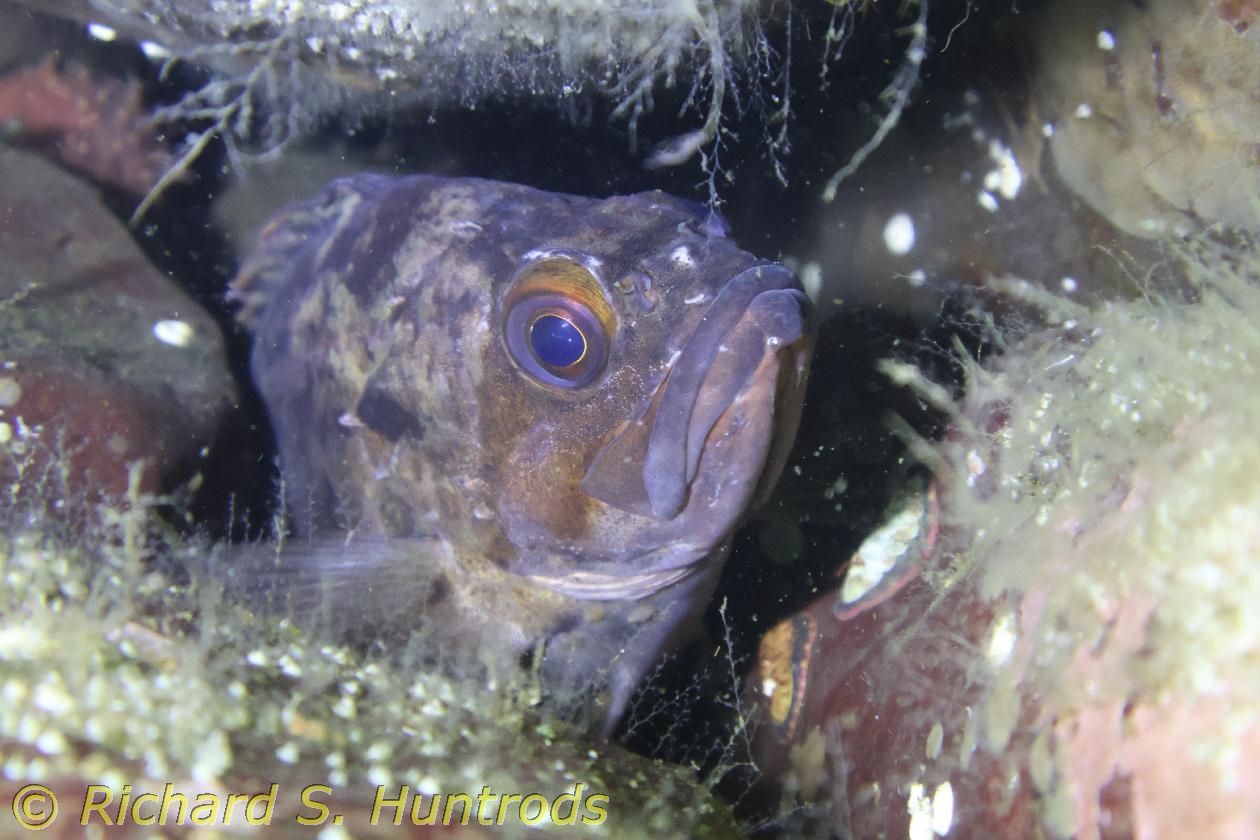
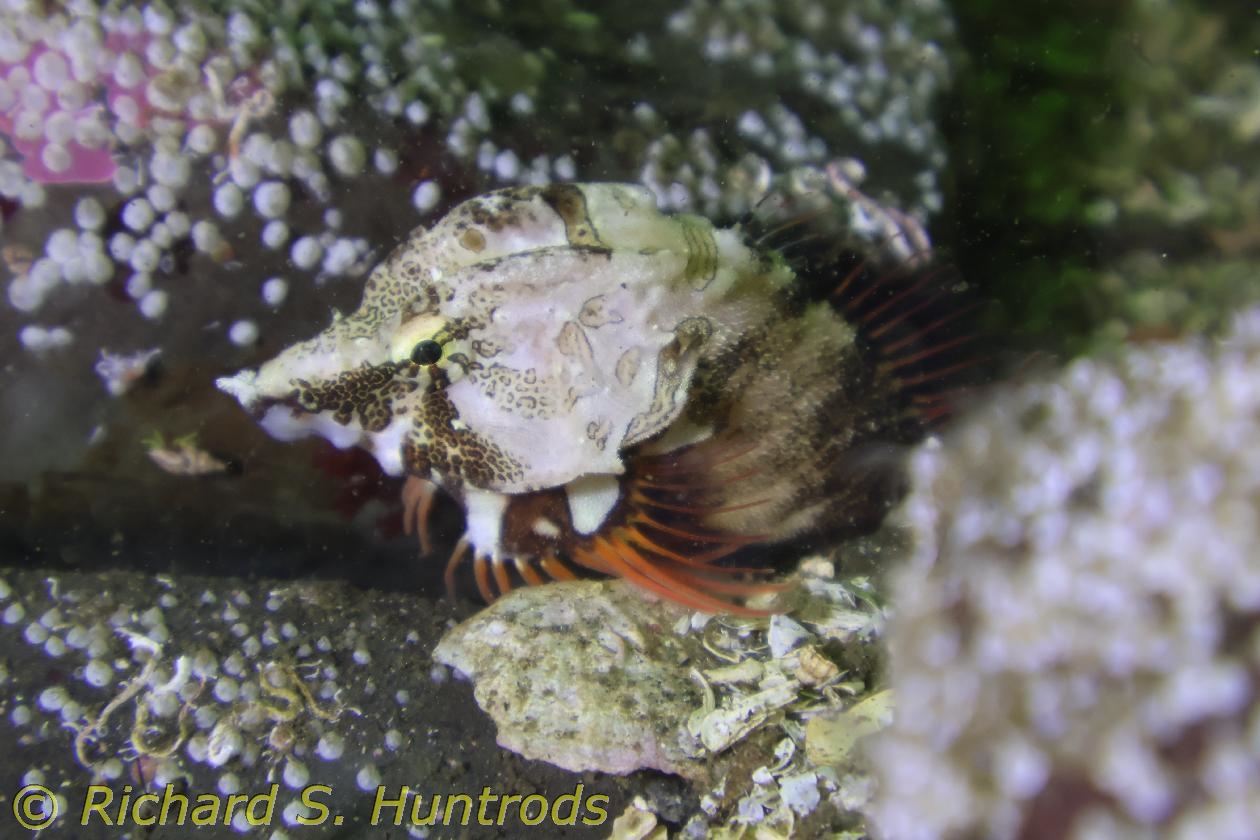
As I mentioned in my review, I save both JPEG and RAW images on the camera. I use the JPEG images for my web log photos, but also import all the RAW images into Lightroom for occasional processing. Here are a few of the squid photos before and after processing in Lightroom. I usually restrict myself to adjusting just a few key parameters such as white balance and exposure settings with the occasional change to vibrance settings.
